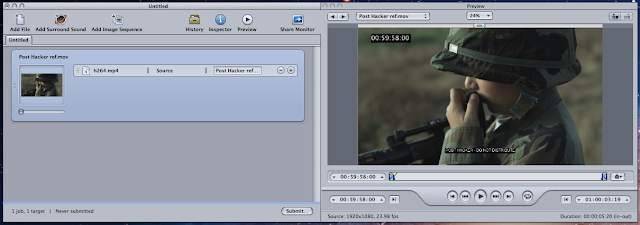
Exporting QuickTimes out of Avid can take a long time, especially if you have timecode burn-in across the picture. But if you offload the burn-ins and encoding to other apps you can get it done in a fraction of the time. And with most of the encoding taking place outside of Avid you can keep working while it crunches in the background. Here’s how.
1. Export your sequence as a QuickTime reference out of Avid
First, export your sequence without any burn-ins as a QuickTime reference. This will usually take less than 5 minutes if you don’t have a lot of effects that need to be rendered first. (And you should render before you export.)2. Add burn-ins with Toki TC
Adding timecode burn-in with Avid causes you to have to render the entire sequence before exporting so we’re skipping that step and adding it after. You add the burn-in with an app called Toki TC. It’s available here and costs $15. There’s a free demo.Open the QuickTime reference in Toki TC. It will ask if you want to add a timecode track, click yes. This matches the timecode burn-in to the timecode track embedded in the QuickTime reference which matches your Avid sequence.
Toki TC gives you the option to add Time Code, Feet+Frames, Frame, and Text burn-ins. Click on the tabs and check or uncheck the ones you want. Then you can change the font, size, color, etc. and position them on the screen where you want them.
Once it’s all set click Save. This will process the timecode and save the burn-ins back to the QuickTime reference movie in just a few seconds. The reason this happens so quickly is because it’s being saved as a QuickTime text track and is not actually “baked” into the picture. That will happen next, in Compressor.
*There is also another app that adds burn-ins similar to Toki TC called QT Sync. It will add timecode as a text track just the same, but I find the UI a little difficult and they’re aren’t as many options for formatting. But QT Sync is free and Toki TC is $15. I prefer Toki TC and think it’s definitely worth the cash.
3. Compress with Compressor - and enable QuickCluster!
Now you have a QuickTime reference with burn-ins and it just needs to be crunched to the desired format. Compressor works best for this (MPEG Streamclip does not work with text tracks). It’s really fast if you set it up with a QuickCluster so it takes advantage of all the cores in your processor. Here are instructions for setting that up.
Compressor will “bake” in the text track to the picture during the encoding. This usually takes about 15 minutes for a 45 minute video because the QuickCluster splits up the video and encodes multiple parts at a time.
In the end we have a 45 minute sequence, with burn-ins, output in less than 20 minutes, from start to finish. Hopefully you find this useful, please leave any comments or questions below.
*In this example I was working with a 45 min DNX36 sequence and crunching in Compressor to an .mp4 at 1,200 Kbps- single pass. I was using a Mac Pro dual 2.66 Quad-Core.


The key to doing this without problems when using media encoded with DNX is to compress the quicktime first using compressor and add the timecode to the H.264 or MP4 file afterwards. When done save as a self contained movie.
ReplyDeleteIf you convert the DNX quicktime first to another format using compressor as you suggest then you would be doing 2 different renders. First converting the DNX in compressor. Then again saving a self contained movie from Quicktime pro after adding the timecode. Not to mention it would be compressing the file twice and picture quality would get worse. (maybe not enough to be an issue)
ReplyDeleteSince the goal is to get this done as quickly as possible it seems it would be faster to use the method I laid out in the post. Are you having problems doing it that way? If so I'd be interested to hear about it.
Thanks!
"Save As…" using "Self Contained" does NOT involve transcoding!
ReplyDeleteIt simply flattens the movie(-data), copying all referenced data to one and the same container.
The speed of this process is mostly just limited by the speed of your harddrive(s), meaning that making sure that you're saving to a different disk than the disk(s) containing the source-media, you can almost double peformance. SSD's obviously can make this 5x faster or more.
But in fact, you don't need to transcode anything! Just adding the text-track should be enough.
The only reason to transcode, is if you target non-Quicktime-compatible devices/OS's/players.
When using H264/AAC/MPEG4 compatible codecs, you can do the same, but using a mpeg4-texttrack in an mpeg4-container file (which is Quicktime Compatible). (checkout http://code.google.com/p/subler/)
You are awesome. I'm so grateful I found your site.
ReplyDeleteI wanted to thank you for this great read!! I definitely enjoying every little bit of it I have you bookmarked to check out new stuff you post. daftar dewapoker
ReplyDeleteGreat post yet I was thinking about whether you could compose a litte more on this subject? I"d be exceptionally grateful in the event that you could expound a tad bit further. Value it! how to make money online at home
ReplyDelete