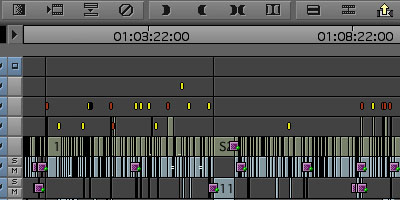
Locators in Avid are a very useful to Editors and Assistants for marking adr or vfx, etc. on the timeline. Unfortunately this feature has some shortcomings that make working with them a bit frustrating. Here’s a tip on how to work around some of the limitations.
Locators live on clips (or filler) and stay attached as the clips move. Once a locator is placed on a clip it is possible to move the locator by Option-dragging the locator in the Composer window. Unfortunately this doesn't give you very precise placement control, moving in increments of a few seconds and making it impossible to place the locator exactly where you need it (say, at the head of a clip). There is also no way to move a locator to another track.
These limitations may sound trivial, but in certain situations, like if you have an editor who is constantly placing locators all over the timeline on different tracks (ahem!), this tip can help you clean it up and save some time at turnover.
The key is exporting the locator list as a .txt document, modifying it, and importing it in to your sequence.
Now you have a list of all the locators in your sequence. You can see in the Track column there are locators on V1, V4, V5. If we want to move them all to V1 we just need to use the FIND and REPLACE command in TextEdit and change them all the V1. Save the .txt file and go back to Avid.
Have any other Locator tips? Leave them in the comments below.


THANK YOU SO MUCH, FANTASTIC. Saved me hours of manually putting them on the right track.
ReplyDeleteWouldn't it be nice if you could export a quicktime with the locator information burned in?
ReplyDelete